Planning Your DIY Carport
Planning your DIY carport is an exciting project that can enhance the functionality and appearance of your property. Whether you’re looking to protect your vehicle from the elements or create a versatile outdoor space, careful preparation is key to a successful build. By understanding the essential steps and considerations involved, you can confidently embark on designing and constructing your own custom carport tailored to your specific needs.
Assessing Space and Location
When planning your DIY carport, assessing the space and location is a crucial first step to ensure the structure meets your needs and complements your property. Consider the size of your vehicle and any additional storage requirements to determine the appropriate dimensions for the carport. Evaluate the available area to ensure there is enough clearance for easy access and door opening without obstructions. Location-wise, choose a spot that provides convenient access from your driveway or main entrance while minimizing the impact on landscaping or yard features. Additionally, think about the orientation to maximize protection from weather, such as positioning the carport to shield vehicles from prevailing winds or harsh sunlight. Proper assessment of space and location sets a solid foundation for a successful DIY carport project that is functional, durable, and visually appealing.
Determining the Size and Capacity
Planning your DIY carport begins with carefully determining the appropriate size and capacity to meet your needs. Consider the number of vehicles you want to shelter, ensuring there is enough space for easy access and maneuvering. Measure the dimensions of your vehicles to decide on the length, width, and height of the structure. Take into account additional space for opening doors and future expansion if needed. A standard single carport typically measures around 12 to 20 feet wide and 20 to 22 feet deep, while double carports require larger dimensions. Additionally, think about the local weather conditions, such as wind and snowfall, which can influence the structural capacity and design. Accurately assessing these factors helps ensure your DIY carport provides safe, adequate, and functional shelter for your vehicles now and in the future.
Checking Local Building Codes and Permits
Planning your DIY carport requires careful attention to local building codes and permit requirements to ensure safety and compliance. Before starting construction, it’s essential to research these regulations thoroughly and obtain any necessary approvals.
- Contact your local building department to understand specific requirements for carports in your area.
- Check if a building permit is needed for your project; this varies depending on size, materials, and location.
- Review zoning laws to confirm the structure’s placement, height restrictions, and setbacks from property lines.
- Obtain all required permits before beginning construction to avoid fines or having to modify your structure later.
- Ensure your design complies with safety standards, including proper load-bearing capacities and resistant materials.
- Keep documentation of approvals and permits throughout the project for future reference or inspections.
Budgeting and Material Cost Estimation
Planning your DIY carport requires careful budgeting and accurate material cost estimation to ensure the project is both practical and affordable. Begin by assessing the size and design of the carport you want to build, considering the number of vehicles it needs to accommodate and any additional features such as storage or covered walkways. Create a detailed list of materials, including posts, beams, roofing materials, fasteners, and paint or sealants. Research current prices at local suppliers or online stores to establish a realistic budget for each item. Factor in additional costs such as tools rental, permits, and potential weather-proofing or insulation, if necessary. To stay within your financial limits, compare different material options, opting for quality and durability while maintaining affordability. Proper planning and precise cost estimation will help you avoid unexpected expenses and complete your DIY carport successfully and sustainably.
Designing Your Carport
Designing your own carport can be an rewarding project that combines practicality with personal style. Whether you’re aiming for a simple shelter or a more elaborate structure, a DIY approach allows you to customize the design to fit your specific needs and space. Proper planning and understanding of materials are essential to create a sturdy and attractive carport that enhances your home’s overall look.
Choosing a Style: Freestanding or Attached
When designing your DIY carport, selecting the right style is essential to ensure it complements your home and meets your needs. Two primary options to consider are freestanding and attached carports, each offering distinct advantages and considerations.
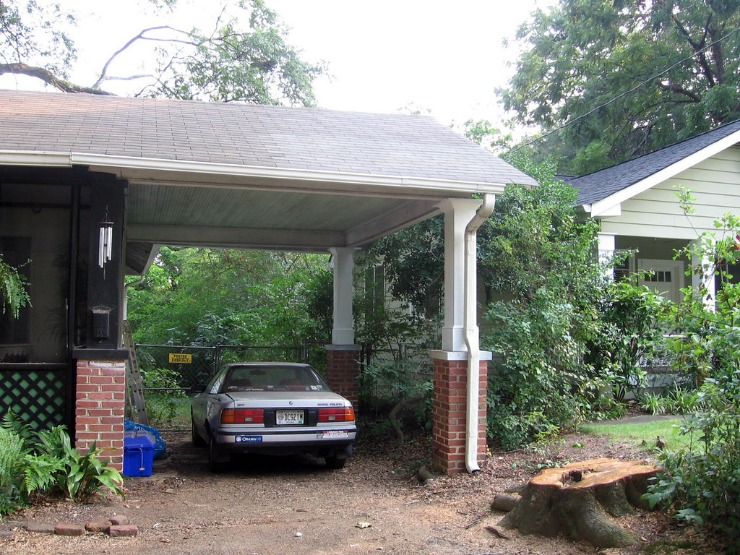
A freestanding carport is a standalone structure that is typically placed separately from your house. This design provides flexibility in placement, allows for better airflow, and can be easier to customize in terms of size and materials. It is ideal if you want to add parking space without modifying your existing home structure or if you require a more portable solution for future adjustments.
On the other hand, an attached carport is built directly against your house, often sharing a wall, which can provide cost savings and a seamless look. This style offers easy access to your home, especially useful in inclement weather, and can be integrated into your existing architectural design for a more cohesive appearance. However, attached structures may require more planning to align with your home’s structure and may involve more complex construction processes.
Ultimately, choosing between a freestanding or attached carport depends on your space, budget, aesthetic preferences, and functional needs. Carefully consider these factors when designing your DIY project to create a practical and attractive shelter for your vehicle.
Selecting the Roof Type
When designing your DIY carport, selecting the appropriate roof type is essential for durability, aesthetics, and functionality. The roof not only protects your vehicle from the elements but also contributes to the overall style of your structure. Consider factors such as climate, budget, and personal preference when choosing the roof style for your carport.
Gable roofs are one of the most common options, featuring two sloping sides that create a peak. They are cost-effective, easy to construct, and provide good water runoff. Flat roofs offer a modern look and are simpler to build, but may require additional drainage solutions. Hip roofs, with four sloping sides, provide excellent stability and better resistance to heavy wind, making them suitable for storm-prone areas. Shed roofs are single-sloped and ideal for a minimalist design, offering straightforward installation but limited headroom. Ultimately, selecting the right roof type will ensure your carport is both functional and visually appealing for years to come.
Deciding on Materials: Wood, Metal, or Vinyl
When designing your DIY carport, choosing the right materials is essential for durability, aesthetics, and maintenance. Common options include wood, metal, and vinyl, each offering unique benefits and considerations.
- Wood: Provides a classic, natural look that can be stained or painted to match your home. It is easy to work with for DIY projects and offers good strength but requires regular maintenance to prevent rot and pests.
- Metal: Usually made of steel or aluminum, metal carports are highly durable and resistant to weather, pests, and fire. They are more challenging for beginners to install but tend to have a longer lifespan with minimal upkeep.
- Vinyl: Known for low maintenance, vinyl carports resist weather, pests, and corrosion. They are generally easier to assemble than metal and offer a clean, modern appearance but may have a higher initial cost.
Creating a Sketch or Blueprint
Designing your carport and creating a detailed sketch or blueprint is a crucial step in a successful DIY project. It helps visualize the final structure, ensures proper dimensions, and aids in planning the necessary materials and tools. A well-thought-out design can also prevent costly mistakes and make the construction process smoother.
- Determine the size and dimensions based on the number of vehicles and available space.
- Choose a suitable style and materials that match your home’s architecture and budget.
- Draft a basic sketch including the footprint, height, and roof design.
- Incorporate structural details such as support beams, posts, and foundation layout.
- Use graph paper or design software to refine your blueprint with accurate measurements.
- Check local building codes and permit requirements to ensure compliance.
- Plan for additional features like drainage, lighting, or storage options.
Gathering Materials and Tools
Gathering the right materials and tools is the essential first step in any carport DIY project. Proper preparation ensures that the construction process runs smoothly and results in a sturdy, safe, and functional structure. By selecting quality materials and having the necessary tools on hand, you can efficiently build a durable carport that meets your needs and enhances your property’s value.
Materials Needed for Frame and Cover
Gathering the right materials and tools is essential for a successful DIY carport project, ensuring durability and ease of assembly.
- Wood or metal framing materials (such as treated lumber or steel beams)
- Covering materials (such as polycarbonate panels, metal sheets, or roofing shingles)
- Fasteners (nails, screws, bolts, and washers)
- Concrete or foundation materials (for footing and support beams)
- Tools including a drill, saw, measuring tape, level, and ladder
Essential Tools Required
Gathering the right materials and tools is a crucial first step in a successful DIY carport project. Having all necessary items on hand ensures smooth progress and helps avoid delays. It is important to select quality materials that are durable and suitable for outdoor use, especially considering weather conditions. Equipping yourself with the essential tools will facilitate accurate measurements, cuts, assembly, and installation, making the project more manageable and efficient.
- Measuring tape
- Saw (circular or hand saw)
- Drill and drill bits
- Screwdriver set
- Level
- Post hole digger or auger
- Hammer
- Wrench or socket set
- Ladder
- Concrete mixer or mixing tools (if pouring foundation)
- Safety equipment (gloves, goggles, ear protection)
Safety Equipment
Gathering the necessary materials and tools is a crucial first step in building a DIY carport. Common materials include wood or metal for the framing, roofing panels, and concrete or gravel for the foundation. Essential tools typically involve saws, drills, screwdrivers, level, measuring tape, and ladders. Ensuring you have all the required supplies before beginning can help avoid delays in your project.
Prioritizing safety equipment is vital to protect yourself throughout the construction process. Wear protective gear such as safety glasses to shield your eyes, gloves to prevent splinters and cuts, and sturdy work boots for foot protection. Additionally, using hearing protection when operating loud power tools and a dust mask to avoid inhaling debris can contribute significantly to a safe working environment. Always follow safety guidelines to minimize risks while working on your carport DIY project.
Preparing the Site
Preparing the site is a crucial first step in any DIY carport project. Proper preparation ensures a solid foundation, enhances safety, and contributes to the durability of the structure. Taking the time to plan and clear the area before construction begins can save time and prevent issues later on. In this article, we will guide you through the essential steps to prepare your site for a successful DIY carport build.
Clearing and Leveling the Area
Preparing the site is a crucial first step in constructing a DIY carport to ensure a stable and durable structure. Begin by selecting a location that is flat, well-drained, and close to your existing driveway or parking area. Clear the area of any debris, grass, or obstacles that could interfere with the foundation. Use a rake or shovel to remove soil, weeds, and loose materials, creating a clean workspace.
Leveling the area involves flattening the ground to provide a solid base for the carport. Use a level tool to check for uneven spots and fill any dips or holes with fresh soil or gravel. Compact the soil or gravel layer with a tamper or plate compactor to prevent shifting or settling over time. A well-leveled and solid foundation will help ensure the stability and safety of your DIY carport, making the subsequent construction steps easier and more precise.
Marking Foundation and Footprint
Preparing the site and marking the foundation footprint are essential steps in building a DIY carport to ensure proper alignment and stability. Clear the area of debris and level the ground where the carport will be installed to create a solid working surface. Accurately marking the foundation layout helps visualize the project and guides your excavation and foundation work.
- Start by measuring and marking the exact dimensions of your carport footprint on the ground using stakes and string or chalk.
- Double-check measurements to ensure proper alignment and symmetry of the structure.
- Remove any grass, roots, or loose soil from within the marked area to create a level base.
- Use a level and a long straightedge or a carpenter’s level to confirm that the ground is flat and properly prepared.
- Excavate the marked area to the required depth based on your foundation plan, typically a few inches to ensure a stable base.
- If necessary, add gravel or crushed stone to improve drainage and stability before pouring the concrete or installing footings.
Ensuring Proper Drainage
Proper site preparation is essential when building a DIY carport to ensure stability and longevity. Start by selecting a level area with good access and enough space for the vehicle and future expansion. Clear away all grass, weeds, and debris to create a clean surface for construction. Assess the underlying soil and consider adding gravel or a concrete slab to enhance drainage and prevent shifting over time. Mark the perimeter of the carport using stakes and string to guide your layout accurately. Ensuring proper drainage is crucial to prevent water accumulation which can cause structural damage; therefore, incorporate slight slopes away from the structure or install a drainage system to direct water runoff efficiently. Taking these steps will create a solid foundation for your DIY carport, helping it withstand the elements and remain functional for years to come.
Building the Foundation
Building a sturdy and functional carport begins with laying a solid foundation. This essential first step ensures that your structure will be stable, safe, and durable over time. Proper planning and preparation are crucial to creating a reliable base that can withstand various weather conditions and support the weight of the carport itself. By understanding the key elements involved in building the foundation, you can set the stage for a successful DIY project that enhances your home’s convenience and appeal.
Installing Concrete Footings or Piers
Building a strong foundation is a crucial step in constructing a durable carport Diy project. Installing concrete footings or piers provides the necessary support to ensure your structure remains stable over time. Begin by determining the placement of your footings based on your carport design and local building codes. Clear the area of any debris and mark the exact locations for each footing or pier. Next, dig holes to the specified depth, typically below the frost line, and ensure they are wide enough to accommodate the concrete forms. Insert forms or reinforce with rebar if required, then pour concrete into each hole, filling them completely. Allow the concrete to cure fully before proceeding to the next phase of your carport construction, ensuring a solid foundation that will support your structure for years to come.
Setting the Frame Supports
Building the foundation and setting the frame supports are crucial steps in creating a sturdy and safe DIY carport. Begin by selecting a level area that can bear the weight of the structure and ensure proper drainage to prevent water accumulation. Lay a solid foundation using concrete footings or poured slabs, ensuring they are deep enough to support the load and are leveled accurately. Once the foundation is set, measure and mark the positions of the support posts according to your design plan. Securely attach the support posts to the foundation using appropriate hardware to prevent movement. Carefully install the frame supports, making sure they are plumb and aligned correctly to provide a stable framework for the carport roof. Proper foundation and support installation lay the groundwork for a durable, long-lasting structure.”
Ensuring Stability and Alignment
Building a sturdy and well-aligned carport DIY project begins with laying a strong foundation and ensuring structural stability. Proper planning and execution are essential to create a safe and durable shelter for your vehicle.
- Start with clear measurements and a detailed plan to determine the size and location of your carport.
- Prepare the site by leveling the ground and removing any debris, ensuring a solid foundation.
- Use concrete or concrete footings to anchor the main support posts securely into the ground.
- Ensure that the support posts are perfectly vertical using a level, as misalignment can compromise stability.
- Attach cross beams and rafters precisely, maintaining consistent spacing for uniform load distribution.
- Check the overall frame with a level and square to confirm proper alignment before proceeding with roofing installation.
- Apply weather-resistant coatings to the structure to protect against the elements and extend its lifespan.
Constructing the Frame
Constructing the frame is a crucial step in building a DIY carport, providing the foundational support for the entire structure. A well-designed and sturdy frame ensures the durability and stability of your carport, protecting your vehicle from the elements. Proper planning, accurate measurements, and careful use of materials are essential for creating a secure and long-lasting frame that meets your specific needs.
Assembling the Side Posts
When constructing a carport DIY, assembling the side posts is a crucial step that provides the main support structure. Begin by measuring and marking the exact locations where the posts will be placed, ensuring they are level and evenly spaced. Dig holes deep enough to anchor the posts securely into the ground, typically at least one-third of the post’s length. Pour concrete into each hole and set the posts in position, using a level to ensure they stand perfectly straight. Allow the concrete to cure fully before proceeding with attaching the frame. Properly assembled side posts create a stable foundation for the entire carport, offering durability and safety for years to come.
Building the Roof Support Structure
Constructing the frame and building the roof support structure are essential steps in a DIY carport project. Begin by measuring and marking the area where you want the carport to stand, ensuring proper space for your vehicle and clearance. Next, set up the foundation, which may include concrete pads or skids for stability. For the frame, cut your vertical posts to the desired height and secure them into the foundation using appropriate fasteners. Attach horizontal beams or rafters between the posts to create the main support structure, making sure to use level and plumb lines for accuracy. When building the roof support, reinforce the rafters with diagonal bracing if necessary to enhance stability. Properly spaced and secured roofing supports will ensure the roof can withstand weather conditions and provide long-lasting protection for your vehicle. Always check local building codes and safety guidelines throughout the construction process to ensure your DIY carport is both safe and durable.
Securing Connections and Bolts
When constructing a DIY carport, it is essential to carefully build the frame and secure all connections with appropriate bolts to ensure safety and durability. Properly assembled framing provides stability and can withstand various weather conditions. Securing connections tightly prevents movement and potential structural failure over time.
Follow these key steps for constructing the frame and securing connections in your carport:
- Begin by measuring and marking the foundation area to ensure accurate placement of the posts.
- Cut the posts and beams to the required lengths based on your design specifications.
- Assemble the frame on the ground, connecting beams to posts using metal brackets or brackets and bolts for extra strength.
- Raise the assembled frame into position carefully, using additional support if necessary to hold components in place.
- Secure the vertical posts to the foundation using concrete anchors or anchor bolts embedded into the ground.
- Connect horizontal beams to the posts, ensuring all joints are aligned correctly before tightening bolts.
- Use high-quality bolts and washers to tighten all connections firmly, avoiding over-tightening which may cause damage.
- Double-check all fasteners to confirm they are secure and that the frame is level and square.
Installing the Roof Cover
Installing the roof cover is a crucial step in building a durable and effective carport. It provides protection from weather elements such as rain, snow, and sun, ensuring your vehicle stays safe and secure. Proper installation of the roof cover not only enhances the overall stability of the structure but also extends its lifespan. In this guide, we’ll walk you through the essential steps to successfully install your carport roof cover and achieve professional-looking results.
Attaching Roofing Panels or Shingles
Installing the roof cover is a crucial step in constructing a DIY carport, providing protection from the elements. Begin by ensuring the roof framework is securely assembled and level. Carefully lay out your roofing panels or shingles, following the manufacturer’s instructions for orientation and overlap. Attach roofing panels or shingles starting from the lower edge of the roof, working upward to prevent water intrusion. Use appropriate fasteners, such as nails or screws, to secure each piece, ensuring they are spaced according to the specified guidelines. Pay special attention to sealing overlaps and edges to enhance weatherproofing and longevity. Regularly check alignment and make adjustments as you progress to achieve a neat, effective roof cover for your carport.
Ensuring Proper Overhang and Drainage
When installing the roof cover for your DIY carport, it is essential to ensure proper overhang and drainage to prevent water damage and maintain structural integrity. Start by measuring and cutting your roofing material, such as metal sheets or shingles, to the appropriate length, allowing for at least 12 inches of overhang beyond the edge of the supporting beams. This overhang directs water away from the carport walls and foundation. Position the roof cover carefully, ensuring it extends evenly and securely fastened to the framing. Incorporate a slight slope into the roof design, typically about a ¼ inch per foot, to facilitate effective water runoff toward the gutters or drainage areas. Install gutters along the edges if necessary, and make sure downspouts direct water away from the foundation. Regularly check that the overhang remains consistent and free of debris, and verify that drainage outlets are functioning correctly to protect your carport from weather-related issues.
Adding Protective Coatings or Sealants
Installing the roof cover and applying protective coatings or sealants are essential steps in a DIY carport project to ensure durability and weather resistance. Begin by selecting the appropriate roofing material, such as metal, asphalt, or polycarbonate panels, according to your climate and budget. Carefully measure and cut the panels to fit your carport frame, then secure them firmly using suitable fasteners. Once the roof is installed, consider applying a protective sealant or coating designed for the chosen material to guard against UV rays, water infiltration, and other environmental factors. Follow the manufacturer’s instructions for application, usually involving cleaning the surface, applying with a brush or sprayer, and allowing adequate drying time. Proper installation and sealing will enhance the longevity and performance of your DIY carport, providing reliable shelter for years to come.
Finishing Touches
Adding finishing touches to your DIY carport project can greatly enhance its appearance and functionality. The right details can transform a simple structure into a stylish, durable, and practical addition to your home. From painting and lighting to decorative accents, these final steps ensure your carport not only protects your vehicle but also complements your overall property aesthetic.
Painting or Staining Wooden Components
Adding the finishing touches to your DIY carport is essential to enhance its appearance and durability. Painting or staining the wooden components not only protects the wood from weather elements but also gives your project a polished and professional look. Choose high-quality exterior paint or stain suited for outdoor use to ensure longevity. Before applying, make sure the wood is clean, dry, and free of dust or mold. If staining, consider applying a wood conditioner beforehand to achieve a more even finish. Use brushes or rollers for smooth application, and allow adequate drying time between coats. Properly finished wood components will protect your carport from moisture, UV rays, and pests, extending its lifespan and maintaining its aesthetic appeal for years to come.
Adding Gutters and Downspouts
Finishing touches for your DIY carport include adding gutters and downspouts to effectively manage rainwater runoff. Properly installed gutters will direct water away from the structure and foundation, preventing potential damage. Select gutters that match the size of your roof and ensure they are securely attached along the edges. Downspouts should be positioned at strategic points to guide water away from the carport, ideally directing it toward drains or areas where it won’t cause erosion. Regular maintenance, such as cleaning the gutters and checking for leaks, will keep your carport protected and in good condition for years to come.
Decorative Elements and Enhancements
Adding finishing touches, decorative elements, and enhancements to your DIY carport can significantly elevate its appearance and functionality. Consider incorporating stylish trim or molding along the edges to create a polished look. Installing decorative brackets or support beams can add character and architectural interest. You might also consider painting or staining the structure to match your home’s exterior, providing a cohesive aesthetic. To enhance durability and visual appeal, add elements such as solar-powered lights, hanging plants, or even customized signage. These details not only improve the overall look but also increase the usability and charm of your DIY carport project.
Maintenance and Longevity
Maintaining a carport and ensuring its longevity are essential for protecting your vehicle and maximizing your investment. A well-maintained DIY carport can withstand the elements, resist wear and tear, and serve you reliably for years to come. Proper upkeep involves regular inspections, timely repairs, and choosing durable materials, all of which contribute to a sturdy and long-lasting structure. By understanding the fundamentals of maintenance, homeowners can enjoy a functional and attractive carport tailored to their needs.
Regular Inspection and Repairs
Maintaining your DIY carport is essential to ensure its longevity and optimal performance. Regular inspection allows you to identify any signs of wear, damage, or deterioration early on, preventing minor issues from turning into costly repairs. Check for rust, loose bolts, and structural stability periodically. Promptly addressing small repairs, such as tightening bolts or replacing damaged panels, can significantly extend the lifespan of your carport. Proper upkeep not only enhances safety but also preserves the aesthetic appeal and value of your outdoor structure over time.
Cleaning and Preventative Care
Proper maintenance and preventative care are essential for ensuring the longevity and functionality of your DIY carport. Regular cleaning helps preserve the appearance and structural integrity, while preventative measures can prevent costly repairs in the future.
- Clean the surface regularly using mild soap and water to remove dirt, debris, and bird droppings that can cause staining or damage.
- Inspect the structure periodically for signs of rust, corrosion, or damage, especially after severe weather events.
- Apply protective coatings or sealants to metal components to prevent rust and extend their lifespan.
- Check and tighten bolts and screws to maintain stability and safety.
- Clear gutters and drainage channels to prevent water accumulation and potential structural issues.
- Schedule annual inspections to identify and address any wear or damage early on.
- Replace any damaged or worn components promptly to prevent further deterioration.
- Ensure proper drainage around the carport to avoid water pooling and erosion at the foundation.
- Keep vegetation away from the structure to prevent moisture build-up and pest infestations.
- Maintain the protective paint or coating on wooden parts to guard against weathering and pests.
Updating or Expanding Your Carport
Maintaining your carport properly is essential for ensuring its longevity and functionality. Regular inspections for rust, leaks, and structural damage can help identify issues early on. Cleaning the area and applying protective coatings can prevent deterioration caused by weather conditions. When expanding or updating your carport, consider adding new supports or roofing materials that match the existing structure, ensuring a seamless look. Upgrading your carport with better insulation or lighting can enhance usability and comfort. Planning ahead and performing routine maintenance will extend the life of your carport, making it a reliable addition to your home for years to come.


